Monday, 31 October 2011

Green Screen and Chroma Keying

For my last little exercise I decided that in order for the afore mentioned shot to take place I was going to need to create some adverts to place into the scene. As this is the future and all adverts are projections or on some large screen beaming they're inane messages onto unsuspecting citizens below, I decided to do a little green screen work.

With the kind help of my multi talented pals Matt Nesbesth and Adam Lyduch, we spent a brief half hour in front of a green screen recording some uber cheese.

Green screen work in a project such as this, and especially advertising is the process of separating the foreground and background elements by what is known as Chroma Keying. Chroma keying essentially takes a sample of a single unnatural colour, usually green or blue, and replaces this colour with transparency leaving a cut out of your designated object, also known as a Matte.

The first thing to take into account when doing chroma key work it light. It's really important to have good light on the green screen and as important to have good light on your subject. I noticed when doing this exercise that shadows are no friend of the keyer. This means to try and keep your subjects as far away from the screen as possible and to also make sure there are no kinks in the screen that could also cast shadows.

As this was a completely impromptu improv advertising session we essentially had to try and sell whatever was on our persons. This made for an interesting shoot.


This first video is of an hugely passionate and expressive Nesbeth. What a great job he's done here. I really feel his extacy and love for the music he's listening too.
This key was pretty straight forward except for what could have been some potentially problematic reflections on the headphones themselves. Reflective surfaces can be a real bitch as they pick up the spill from the green screen and punch holes in your matte.


As this image of the Alpha channel shows the holes left in the matte by reflections and spill from the green screen. Luckily this was not a problem with this particular shot as you shall see in preceding posts.

The second shot that I worked on from this shoot was of Adam Lyduch selling a phone. This was also an exercise in cheesyness.

Here there is a similar potential issue with a reflective, almost mirror like object of an iphone. Thankfully the phone was never on the right angle to pick up the green screen so we kind of dodged a bullet there.
For this second key I employed a process known as Hard and Soft keying. This is a method taught to me by my man on Frankenweenie, Mr. Jon Brady. Jon is a veritable wealth of knowledge on all things Nuke and what he doesn't know he will find out.
Hard and soft matting works by combining a number of different keys together to help achieve a natural looking key without loosing to much edge detail.


As this first image of the Alpha channel demonstrates, the edges of the key when compared to the original footage are very harsh with very little detail around the hair. This is the hard matte and is intentionality keyed this way. The hard matte is a very basic matte, the green is keyed, in this case using the program Keylight within Nuke and the edges shrunk, or dialated to the negative. The alpha channel from this hard matte is then piped to a second instance of keylight where it is added to the inside matte, meaning the opaque part, or white part of this image is added to the second keyer.


This second keyer, with the opaque hard matte piped into it is then used to bring back the edge detail and creating a more believable key. This can be seen in the hair and stubble area's as the softness and detail is clearly visible.

Tuesday, 25 October 2011

Location Concepts

This weekend I went out and had a look around Bristol for some locations that I thought would suit the ideas I have for my first VFX undertaking.

The initial idea I had was one of very contemporary Sci-Fi cinema, along the lines and concepts of the film Minority Report and iRobot. One aspect of modern culture that I see as pervasive and a trend that is likely to become more and more ubiquitous in coming years is advertising. Capitalism, but more specifically consumerism, seem to be the driving force that is taking over modern society and it is something that I can only see accelerating into the future.

This clip from the Stephen Spielberg film Minority Report is an influence on what I see for this first shot.

This is what forms the basis of my first shot. Originally my thoughts were to keep the footage as raw as possible, working on the idea of a slice of real life as opposed to a carefully scripted and rehearser, filmic camera move. I felt that this would give the shot more credibility. An example of this would be perhaps the way a lot of the VFX was done in the film Cloverfield. Cloverfield contained a lot of hand held footage and combined with modern VFX techniques gave a very unique and realistic look.

Cloverfield trailer; handheld VFX are very convincing.

My thoughts on how to achieve this kind of look had up until now been based on the motion tracking technique, where by the footage is tracked and elements inserted. However upon further inspection of these kinds of shots I realised that a lot of the action has been shot on green screen and composited after the fact. 

In early tests with motion capture I found it increasingly more difficult to get accurate camera solves, or, accurate tracks in low light situations and more recently jerky footage. This is now making me reassess how I will complete my shots.

The following sequence of shots comes from my own investigation into locations here in Bristol that would best suite the mood of this shot. Bristol has some great locations and the first place I checked out was Nelson street. Nelson Street, now known for its graffiti, is a great location due to its ungodly, Orwellesque, Brutilist type architecture. This sits in perfectly with the grittiness I was trying to accomplish for a sort of dystopian view of the future.


These 4 sequences are all from the same street. Looking at this footage I am pretty much sold as to this being my final location for this shot due to it's unique topology. However these location tests have proved very difficult to track accurately. I am beginning to see a lot of limitations with Autodesk's Matchmover 2012 in what it can track accurately. For now I am moving into Nuke X to try and make more accurate tracks with Nukes inbuilt camera tracker. Should this fail I will have to reassess the type of shot and movement of the camera and perhaps consider a track and dolley or maybe some kind of steadycam to help with the Solve.

Wednesday, 19 October 2011

Multi-Channel Compositing


Here I've got a bunch of passes from my Robot for comp. Compositing is the process of taking all the elements that are going into a shot or sequence and essentially tying them together into one coherent image. This process quite often entails colour matching, focus matching and lighting adjustment. Green screen or chroma keying are also part of the compositing process as the need to "pull mattes" is central to a compositors roll.

For this latest exercise I wanted to do some touch ups of my robo-man to a level of accuracy that can't easily be done in a 3D package. As the compositing process is generally, but not exclusively, done in a 2D environment it is a lot faster and economical to do these touch ups as opposed to the 3D world. This however is a trend that is being challenged with ever more complex 3D systems being built into compositing software.

After my render was completed in Maya I exported my Robot via the .exr file type. .exr's are a very very handy file format. Developed by Industrial Light and Magic, .exr's enable a 3D artist to embed as many passes into the one file as necessary. Having this level of control makes the compositors job much easier to tweak any aspect of a particular sequence.

Below is the process of my quick comp job on my robot and outlines the amount of data that can be packed into and .exr file.


This Image is my straight rendered .exr file directly from Maya into Nuke. The image is displaying all layers concurrently and looks blown out due to incorrect layer blend modes. However once the .exr is unpacked and manipulated this ceases to be a problem.
Most Image formats that people are familiar with such as JPG and GIF files generall carry 3 or 4 channels, and RGB and an A, or, Alpha channel for transparency information. As you will see with the next series of Pictures, one .exr file can carry infinitely more than this.

When rendering out multiple passes in Maya, it is generally done in a lighting type basis. That is, all the separate aspects of the lighting state are broken down into their constituent parts to allow greater control over the fnial output.


This first cell is the diffuse pass. This is a lighting pass that will only render light that is reflected from a surface in a diffuse, or Matte way. 


The next pass I rendered out is the Specualr pass. This deals with the highlight of the objects materials and generally appears on shiny materials. The blend mode for this was screened over the top of the diffuse pass removing the blacks and just leaving the highlights.


The next pass is the reflection pass. This, as the name suggests, has simply picked out all the reflections from shiny objects. This is very handy as the over look of the material can be altered by adjust this pass.


This next pass is the shadow pass. The blend mode for this worked on a subtract basis, that is all the pixels in this pass are used to subtract, or add darkness to the composite image.

This final pass is whats known as a depth map. It is used as a matte to control a z-depth blur. When attaching a depth map to a z-depth blur, the darker areas are uneffected by the blur, where the white area's are completely blurred. This is used to give the render depth of field, thus the name z-depth blur.

After tweaking the final comp came out like this.


As you can see when compared to the top image, the straight Maya render, multi-pass compositing adds the final sheen to a CG render. The process is extremely fast and is a great way to get results that are rarely seen with a 3D package alone.

Mental Ray Rendering

Today I was having a quick look at some of the render options within Mental Ray in Maya, and I have to say, it shits all over the Maya Software renderer. As a part of the course we were asked to design a character in Maya that would eventually get rigged and animated, I assume using Maya's IK and bone animation tools...or whatever, I haven't really looked to much into animating yet, that's still to come.


Anyway, as I'm looking at placing CG into real world environments, I thought I'd create a robot...which seems to be becoming a recurring theme on this blog... But this robot wasn't a large robot that turns into a car and destroys everything within close proximity, I was thinking a little more realistically about this one. I've always been a bit of a sci-fi fan, but believable sci-fi. So I was looking more at a design of a robot along the lines of the Isaac Asimov/Will Smith type genre. I was also influenced by the visual style of the Chris Cunningham video for Bjork's all is full of love. These to me seems to represent a more realistic representation of what robots will one day represent. This film clip and Asimov style narrative also raises a lot of philosophical and sociological questions, but I'm not getting into that right now. Needless to say it's a bad arse clip with some equally bad-arse CG and model making.


Chris Cunningham and Bjork's all is full of love.
Sonny the NS-5. IRobot.

But anyway, I've digressed into talking about robots again...Damn! So, as I was saying and as is the name of this post, I was looking at Maya's mental Ray renderer, specifically Global Illumination and Final Gather. Up until now whenever I had modelled, textured and rendered any object, I had strictly used Maya's ray trace shadows and reflections and be done with it. Although high quality ray trace shadows can look very effective, there is still a something intrinsically CG them. This is where Global Illumination and Final gather come in. 

When rendering with just ray trace shadows, the geometry receives light and casts shadow as it would in the real world, but it doesn't reflect light onto other objects or ambient lighting. This ambient lighting is such an important part of rendering and can take a good render and make it look a hell of a lot more realistic.

The first rendering here of my robot here was done using just ray trace shadows. Although the shadows are mathematically correct they don't look realistic.


The second render here is without Ray Trace shadows, but instead has used Global Illumination and Final gather to calculate the lighting. The Global Illumination function causes the light source to emit virtual photons into the scene and them map them as they decay and interact with the geometry in the scene. I have initially had a few issues with getting this to work but the final result gives a much more true to life representation of the objects.

This light bouncing and ambient lighting effect can been better demonstrated when getting up close to the geometry to see its effects. Again, the first rendering is with Ray Trace shadows turned on, without Global Illumination or Final Gather and the second is the opposite.


Note the darkness of the shadows in the top render as opposed to the ambient light in the shadows in the bottom render. The effect is quite subtle but I think makes a big difference.

So there you have it, a brief look at the finer point of Mental Ray and of course more robots. I'll be looking into how to actually animate this guy in coming weeks and eventually try and drop him into some match moved footage. Perhaps creature comforts style talking about what it was like being raised in Bristol...

Sunday, 16 October 2011

3D Tracking

In an earlier post I took a quick look at the process of Matchmoving, however in retrospect that probably wasn't the best example of matchmoving or 3D tracking process as the movement was only in 2 dimensions. When talking about matchmoving there is a very important difference between 2D and 3D tracking, namely 3D tracking is a much more annoying. 2D tracking is something that can be performed in programs like After Effects and simply relies on the tracker following certain points around the frame. 3D tracking on the other hand is somewhat more complex a process. 3D tracking points are collected via manual track points or auto track points and used to calculate and rebuild a virtual 3D environment with a 3D package such as Maya.


As I have found throughout this latest exercise, it is vitally important to have as much information about your physical camera as possible. The focal length (length of the lens) and the film back (camera aperture or camera censor size) help turn a nightmare track into something a bit more manageable. That and I might also add that Autodesk Matchmover 2011 is a serious pain in the arse. I downloaded a free student licence of Maya 2012 and Matchmover 2012 kindly from Autodesk with a 36 month licence. Anyone interested the address is http://students.autodesk.com/?nd=download_center Make use of being a student and get as much free shit as possible.


But I digress. After downloading and installing Matchmover 2012 the automatic tracking was a breeze. You'll need to break your footage down into an image sequence, I used a Targa sequence which decompiled pretty quick and good quality with Adobes Media Encoder.  Then it's simply a process of upping the quality of your auto track and the length that tracks will stick to the points. Once the track was finished, I solved the camera create 3D points within the scene and added a coordinates system to tell the 3D package which way is up. This is a very important step and helped to line everything up within the Maya axis.


3D Track points within Matchmover after automatic tracking and camera solve. Not the inverted axis with the Y pointing downwards. (Mistake within MM but rectified in Maya).


Once my camera created in Maya it was simply a matter of recreating the lighting of my environment. I used Maya's IBL (image based lighting) to create my environment from within Mental Ray with a full panoramic photo of my living room. This also created reflections within my geometry to help sell the cup. The shadows and reflections on the table were created with a Background shader. This allows a material to only display specular and reflections within the environment. After a bit of tweaking I rendered it out pretty low res and did some colour grading in AE to help tie it all together.


Left middle - perspective view of cup and background shader geometry. Right middle - IBL environment and camera tracks and image plane.


All in all I'm really pleased with the way it came out. Even though it is a very simple shot and piece of geometry, the actual track and coordinates systems proved the can work perfectly and open the door to some much more complex shots to come. Watch this space!


3D Track with geo and grade
Raw Footage.

Tuesday, 11 October 2011

3D Modelling

So, the last week or so I've spent locked away in a small cupboard learning the finer points of Maya, thanks to the online Escape Studios Maya Fundamentals course. This has already made my coming back to uni for my final year worth while as alone these courses are around 4k. So kudos to UWE for getting on-board with the industry leading software trainers.

Anyway, as I've just finished the extensive modelling and texture parts of the introducing Maya part (a small part of the entire course) I thought I'd do some very basic modelling to put what I've learnt into practice.
This exercise works on a few different levels. As my ultimate goal is to create live action VFX, learning to model objects to then place into match moved scenes in Maya is good practice for projects further down the road when I look into full 3D matchmoving.

What I've discovered thus far is that modelling makes up only one aspect of the whole process to create photo realistic sequences. Texturing, lighting and animation are as important as the models themselves. A film that stuck with me as having amazing modelling, texturing and realistic lighting was the latest Transformers film, The Dark of the Moon.

Optimus Prime from Transformers: The Dark of the Moon.

The level of detail in the textures and the detail in the models themselves was something to behold. I don't care that the story was non existent, the film had large robots, fast cars, explosions and hot chicks. What more do you want?

So, here comes the anticlimax when I show you what I've been working on....I decided to model a simple car to begin with, with some simple metallic textures. The idea behind this is that it is something that I can later build upon and drop into some live action tests.

My lame ass blob car

At the moment it's pretty low detail and needs a lot more of the subtitles added, as well as some more complex textures, but for the moment it will suffice and is a good start for further explorations when I get onto doing proper shots. 

Thursday, 6 October 2011

Matte Painting

So, as a pre cursor to getting into the animated/live action VFX, I thought I'd do  few pre-viz matte paintings to get the feel of the old faithful, Photoshop again.  Matte painting goes back a loooong way in the VFX/SFX industry. I'm sure you've all seen those amazing paintings in the background of some Hollywood lot of mountains or galaxies etc. Something a little like this no doubt: 
The classic Wizard of Oz matte paintings. Follow the yellow brick road. 


Needless to say with the advent of programs like Photoshop, Matte painting has moved on considerably since then. The art of matte painting now involves as many aspects as the compositing process, using CG, real life photo textures and good old fashion painting techniques. Here's a good example of what is now possible through the magic of computers.
Couracant from the new Star Wars films. Bad ass Shiz!


The technique for something like this would be a mixture of CG modelling basic geometry which is then passed to the Matte Painter to weave some magic and add the detail and subtitles by hand.
Not only is matte painting for the purpose of static (and sometimes dynamic) backdrops, but with the development of such 3D packages as Maya and Max, a matte painting can of touched up geometry can then be imported back into the 3D package and projected back onto the original geometry as a way of adding high quality texture and a level of precision that is not possible through 3D texturing alone.


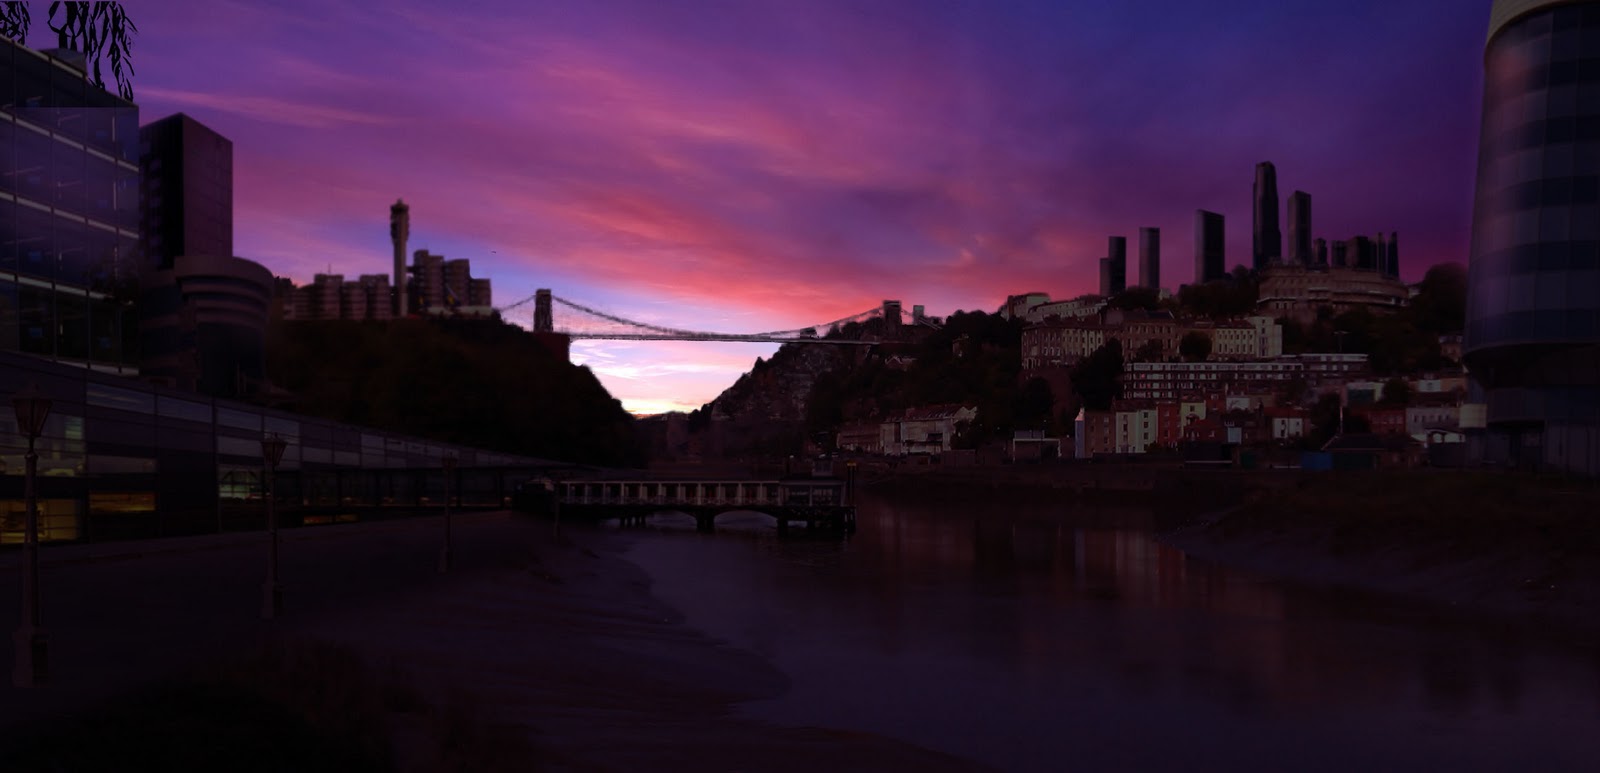
Anyway, here's a few Pre Viz matte paintings I've done on a quick snap I took of the Avon Gorge here in Bristol. They're just matte tests to get a bit more practice in Photoshop, but the process of making these shots has given me a glimpse at the possibilities of matte painting. 


These 3 shots are all the same photo and I was having a little play with the history of the Avon Gorge playing with some visualizations of Yesterday, Today and Tomorrow.
Still very rough but a worth while exercise!